


ကဲ့အထက္ပါ Button ပံုတစ္ပံုဆြဲၾကည့္ရေအာင္။ ပထမ New Document တစ္ခု ယူလုိက္ပါ။ ျပီးေတာ Tool Box က Ellipse Tool (F7) ကို ယူလုိက္ပါ ျပီးေတာ ေအာက္ပါ အဝိုင္းတစ္ခုဆြဲလိုက္ပါ။
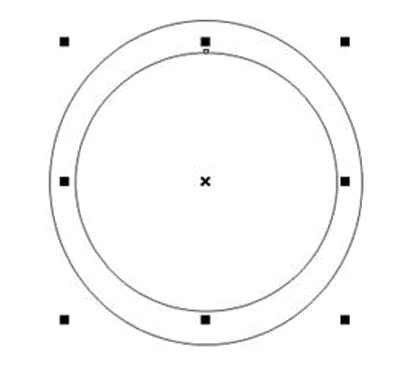
အထက္ပါ အဝိုင္း ႏွစ္ခု ဆြဲျပီးသြားရင္ Object ႏွစ္ခု ကို Selection လုပ္လိုက္ပါ။
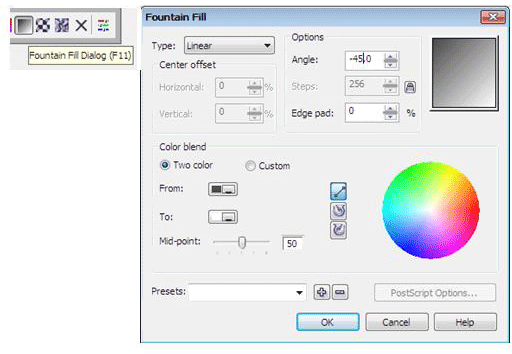
ျပီးေတာ Tool Box က Fountain Fill Dialog (F11) ကို Click လိုက္ပါ။ ျပီးေတာ ေအာက္ပါပံုကဲ့သို႔ ထားလုိက္ပါ။

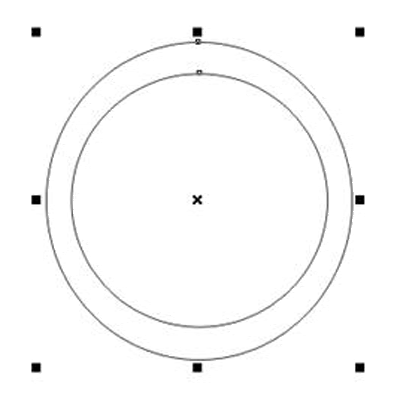
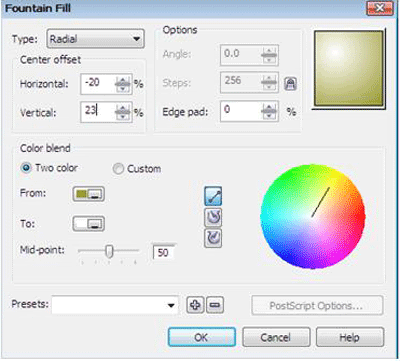
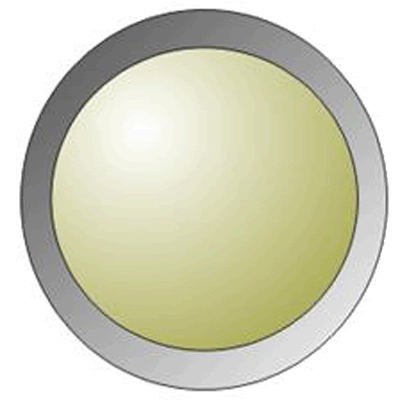
ျပီးေတာ အထဲ့က အဝိုင္းကို Select လိုက္ပါ။ ျပီးေတာ ေနာက္ထပ္ Tool Box က Fountain Fill Dialog (F11) ကို Click လိုက္ပါ ေအာက္ပါကဲ့သို႔ ထားလုိက္ပါ။
ျပီးေတာ Tool Box က Text Tool (F8) ကို Click လိုက္ပါ။ ျပီးေတာ “Home” စာေရးလိုက္ပါ။

အထက္ပါကဲ့သို႔ စာေရးျပီးသြားရင္ Tool Box က Interactive Drop Shadow Tool ကို ယူလုိက္ပါ။ ေအာက္ပါ ကဲ့သို႔ အနည္းငယ္ေလာက္ ေအာက္သို႔ ဆြဲခ်လိုက္ပါ။

ကဲ့ျပီးသြားပါျပီး။ အားလံုးေပ်ာ္ရႊင္ႏိုင္ၾကပါေစလို႔ ဆႏၵျပဳလိုက္ပါတယ္။

No comments:
Post a Comment